# Appendix: Editor Support
We have written a Visual Studio Code (VS Code) extension (opens new window) that supports syntax highlighting for files written in the Litexa
language for Alexa skills. Any such files will be denoted with the .litexa file extension.
# Installation
Visual Studio Code will prompt you to install the extension whenever you open a .litexa file. The dialog will look like this:
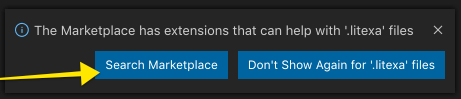
- Click on "Search Marketplace"
- It should find the extension called "Litexa Syntax Highlighting", click "Install"
- That's it!
NOTE
Alternatively, you can also search the Visual Studio Marketplace within Visual Studio Code for ext:litexa or litexa and install from there.
More info about the extension can be found at https://marketplace.visualstudio.com/items?itemName=litexa.litexa-syntax-highlighting (opens new window)
# Manual Installation from Source
If you’d like to contribute to the extension or customize it for your own usage, you can locally install it from its source code:
- Clone the alexa-games/litexa (opens new window) repository.
- Copy or symlink the
litexa-vscode/litexadirectory to your VS Code extensions directory. - Relaunch or reload VS Code.
Symlinking
The added benefit of using a symlink is being able to keep the extension up-to-date by running git pull on this project when a
new feature is launched.
# VS Code Extensions Directory
Extensions are installed in a per-user extensions directory. Depending on your platform, the directory is located here:
- Windows
%USERPROFILE%\.vscode\extensions - macOS
~/.vscode/extensions - Linux
~/.vscode/extensions
You can change the location by launching VS Code with the --extensions-dir <dir> command line option.